This guide focuses on adding new node(s) to an existing Openshift setup.
If you need to setup an Openshift Origin 3.10 environment, please find relevant instructions here.
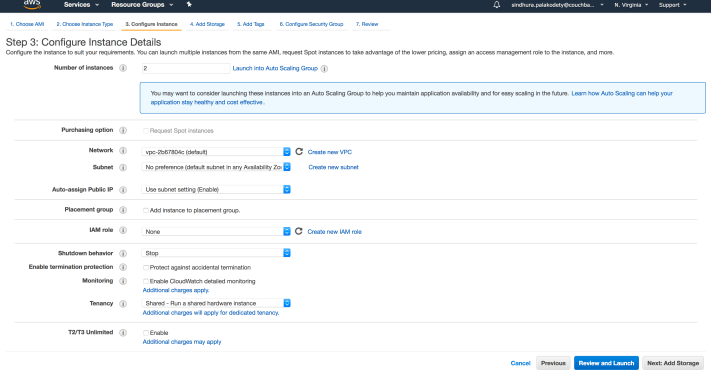
Step 1: Bring up required number of EC2 instances using AWS Management Console
Step 2: Exchange keys between the Master nodes and the New nodes
- Login to the Master node as root user.
- Copy the contents of the public key generated on the Master Node using the steps above:
cat /root/.ssh/id_rsa.pub

- Copy-paste the content above to the end of the file
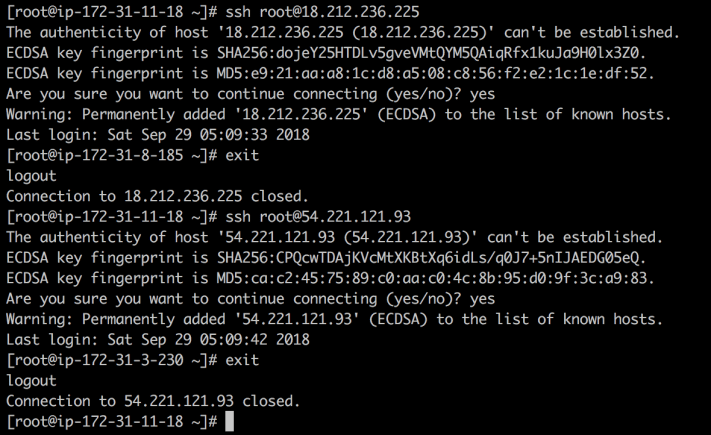
~/.ssh/authorized_keyson new nodes in the cluster. - SSH from the Master node into each of the New nodes as root user and ensure that you enter “Yes” as shown below. (This is done to avoid any prompting during the actual Openshift installation).
Step 3: Install Required Packages
Perform the following steps on all the New nodes:
- Install required packages on New nodes using yum
yum -y install wget git net-tools bind-utils yum-utils iptables-services bridge-utils bash-completion kexec-tools sos psacct
yum -y update
yum -y install docker-1.13.1
- Install RPM-based-Installation Packages
yum -y install https://dl.fedoraproject.org/pub/epel/epel-release-latest-7.noarch.rpm
sed -i -e "s/^enabled=1/enabled=0/" /etc/yum.repos.d/epel.repo
yum -y --enablerepo=epel install ansible pyOpenSSL
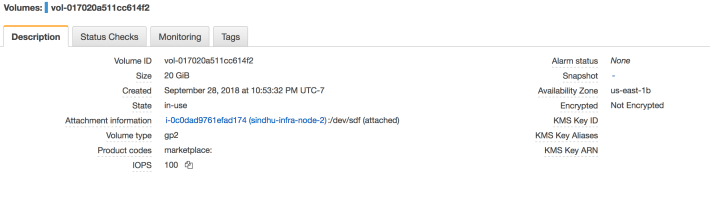
- Create EC2 volumes (for New nodes) in the following way:

- Attach the volumes to the New nodes.
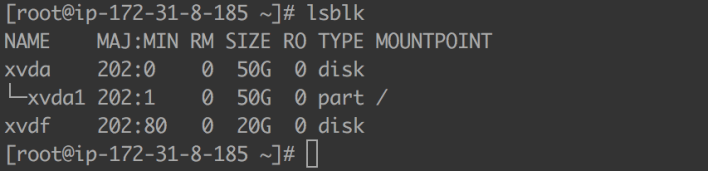
- The command
lsblkshows that the EC2 volumes are successfully attached to the nodes. For example:
- On all the New nodes, in the file
/etc/sysconfig/docker-storage-setup, set DEVS to the path of the block device attached.
For example:
cat <<EOF > /etc/sysconfig/docker-storage-setup
DEVS=/dev/xvdf
VG=docker-vg
EOF

- Execute the command to setup docker storage:
docker-storage-setup
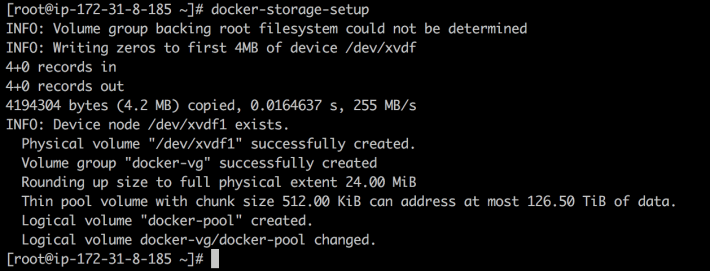
- Execute
lvscommand. The output should look like the below:

- Set docker option using the following command on all nodes:
sudo sed -i '/OPTIONS=.*/c\OPTIONS="--selinux-enabled --insecure-registry 172.30.0.0/16"' /etc/sysconfig/docker
Step 5: Preparing the Ansible inventory file
Perform the following steps on the Master Node:
- Modify the file to add details related to the New Nodes:
vi /etc/ansible/hosts
- Notice the content in blue:
# Create an OSEv3 group that contains the masters, nodes, and etcd groups
[OSEv3:children]
masters
nodes
etcd
new_nodes

# Set variables common for all OSEv3 hosts
[OSEv3:vars]
# SSH user, this user should allow ssh based auth without requiring a password
ansible_ssh_user=root
# Deployment type: origin or openshift-enterprise
openshift_deployment_type=origin
# resolvable domain (for testing you can use external ip of the master node)
openshift_master_default_subdomain=54.164.5.171.nip.io
openshift_hosted_manage_registry=true
openshift_hosted_manage_router=true
openshift_router_selector='node-role.kubernetes.io/infra=true'
openshift_registry_selector='node-role.kubernetes.io/infra=true'
openshift_master_api_port=443
# external ip of the master node
openshift_master_cluster_hostname=54.164.5.171.nip.io
# external ip of the master node
openshift_master_cluster_public_hostname=54.164.5.171.nip.io
openshift_master_console_port=443
openshift_docker_insecure_registries=172.30.0.0/16
openshift_master_identity_providers=[{'name': 'htpasswd_auth', 'login': 'true', 'challenge': 'true', 'kind': 'HTPasswdPasswordIdentityProvider'}]

# host group for masters
[masters]
54.164.5.171

# host group for etcd
[etcd]
54.164.5.171

# host group for nodes, includes region info
[nodes]
54.164.5.171 openshift_node_group_name='node-config-master'
52.90.165.132 openshift_node_group_name='node-config-compute'
54.86.70.56 openshift_node_group_name='node-config-compute'
18.208.130.47 openshift_node_group_name='node-config-infra'

[new_nodes]
18.212.236.225 openshift_node_group_name='node-config-compute'
54.221.121.93 openshift_node_group_name='node-config-infra'
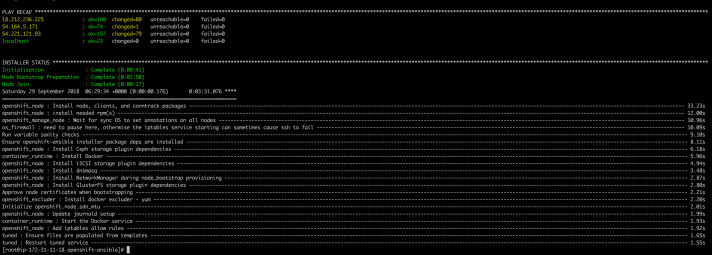
- Run the scaleup.yml playbook. If your inventory file is located somewhere other than the default of /etc/ansible/hosts, specify the location with the
-ioption.
ansible-playbook -i /etc/ansible/hosts playbooks/openshift-node/scaleup.yml
Step 6: Validating the Environment
Perform the following steps on the Master Node:
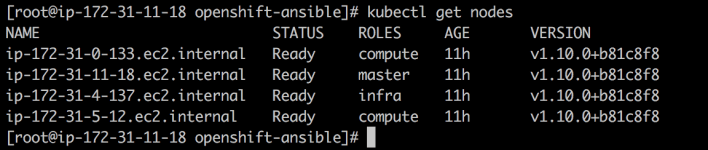
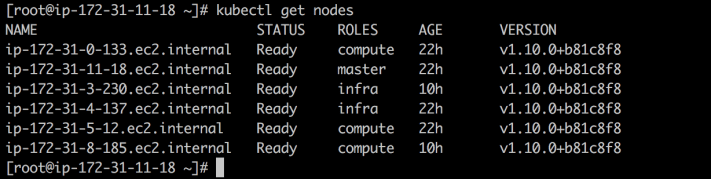
- Verify the Master, Compute and Infra nodes using the command below and ensure that they are in Ready status:
kubectl get nodes
Output before adding nodes:
Output after adding nodes (1 infra and 1 compute):

Disclaimer: All data and information provided on this site is for informational and learning purposes only. cloudliftandshift.com makes no representations as to accuracy, completeness, currentness, suitability, or validity of any information on this site and will not be liable for any errors, issues, or any losses, damages arising from its display or use. This is a personal weblog. The opinions expressed here represent my own and not those of anyone.

One thought on “Quick Guide for adding new node(s) to an existing Openshift Origin Setup on AWS”